Pavlova is a dessert you might fall in love with at first bite, especially if you have a thing for sweets that are light yet luxuriously delicious.
This dessert is named after the Russian ballerina Anna Pavlova, who was as delicate and elegant as the treat itself. The pavlova boasts a meringue base, which is crispy on the outside and soft on the inside, much like a marshmallow.
Imagine topping that cloud-like meringue with a generous dollop of whipped cream and a scattering of fresh, colorful fruit – that’s what makes the pavlova a showstopper at any gathering. The dessert has its origins shrouded in a bit of mystery, claimed by both Australia and New Zealand, and has been a celebrated part of their culinary heritage since the early 20th century.
Your journey into making your own pavlova might start with whisking egg whites into a frenzy and gently folding in sugar, cornstarch, and a splash of acid to help fortify the meringue structure. It’s then baked at a low temperature until it reaches that signature crisp exterior. With a little practice, pavlova could easily become your go-to dessert for impressing guests or indulging in a quiet, sweet moment to yourself.
Pavlova Dessert Origins and History
Pavlova is a dessert whose delicate, meringue-based structure and contentious history match the lightness of the ballerina it’s named after. It’s a sweet dish with a captivating debate over its true origins.
Anna Pavlova: The Inspiration
The dessert pavlova was named to honor the famed Russian ballerina Anna Pavlova during one of her tours to the Southern Hemisphere in the 1920s.
Australia vs New Zealand: The Controversy
The origin story of pavlova is hotly contested between Australia and New Zealand, each laying claim to its invention.
Professor Helen Leach of Otago University, New Zealand, has extensively researched this topic, but the sweet’s true origins remain subject to friendly rivalry. Aussies and Kiwis both incorporate it into their national identity, so you might hear different origin tales depending on where down under you find yourself.
The Perfect Pavlova Recipe
Creating the perfect Pavlova is about precision and patience. Below are the specific ingredients and steps to help you craft a delicate and delightful meringue-based dessert that’s sure to impress.
Key Ingredients
- 4 large egg whites at room temperature
- 1 cup (200g) caster sugar or superfine sugar
- 1 tsp cornstarch
- 1 tsp white vinegar
- 1/2 tsp cream of tartar (optional for stability)
- 1 tsp vanilla extract
- A few drops of lemon juice (to clean the mixing bowl and stabilize the whites)
Step-by-Step Baking Process
- Preheat your oven to 250°F (120°C) and line a baking sheet with parchment paper.
- Use a clean, dry bowl and add a few drops of lemon juice. Beat your egg whites until soft peaks form, then gradually add the granulated sugar, about a tablespoon at a time. Continue beating until stiff peaks form and the meringue looks glossy.
- Sift the cornstarch into the meringue, add the vanilla extract, white vinegar, and cream of tartar (if using). Fold gently to combine without deflating the meringue.
- Spoon the meringue onto the prepared baking sheet, shaping it into a circle with a slight well in the center to hold your toppings later.
- Bake in the preheated oven for about 1 to 1.5 hours. It’s done when the meringue is crisp on the outside and dry to touch.
- Turn off the oven and let the pavlova cool completely inside to prevent cracks.
Remember that precision in measuring your pavlova ingredients and patience in baking and cooling are your keys to success.
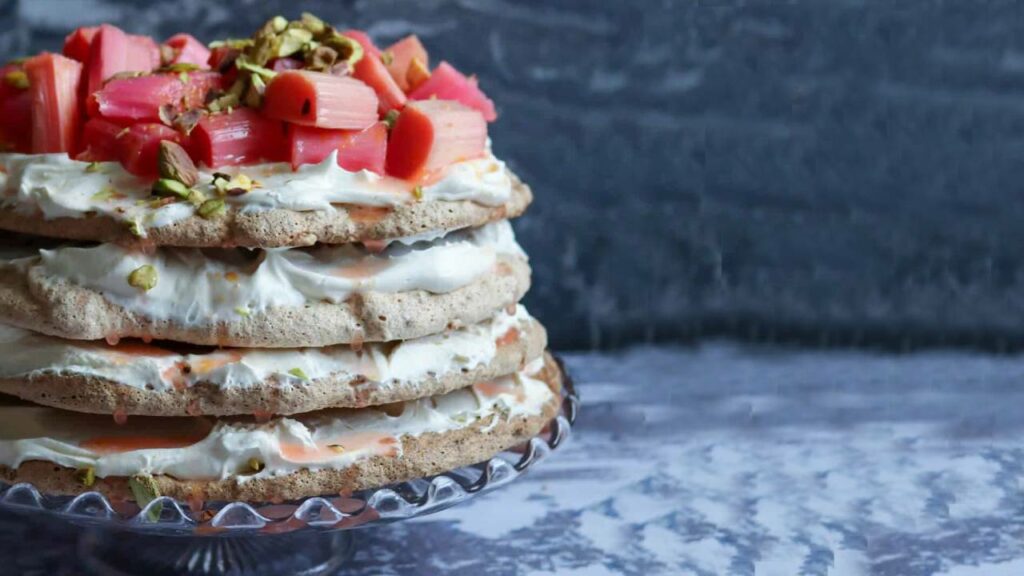
Assembling the Pavlova
Once your pavlova base is properly baked, achieving that irresistible combination of crisp meringue and soft marshmallow center, it’s time to turn this blank canvas into a masterpiece with proper layering and adornment.
Whipping the Cream
Begin by chilling your mixing bowl and beaters in the fridge for at least 15 minutes; this will help you whip the cream more efficiently. Pour heavy cream into the chilled bowl and start whipping. Once it starts to thicken, add a sweetener if you prefer, and continue to whip until you achieve soft peaks. The cream should hold its shape but still be smooth and billowy.
Arranging the Fruits
Choosing your fruits is like picking the colors for your painting—go with what’s fresh and appealing to you. Start by slicing kiwis, mangoes, or any stone fruits you fancy. Berries are traditional—strawberries, blueberries, and raspberries all provide a beautiful contrast to the white cream. Gently lay these fruits over the whipped cream in a pattern or simply scatter them for a more rustic look.
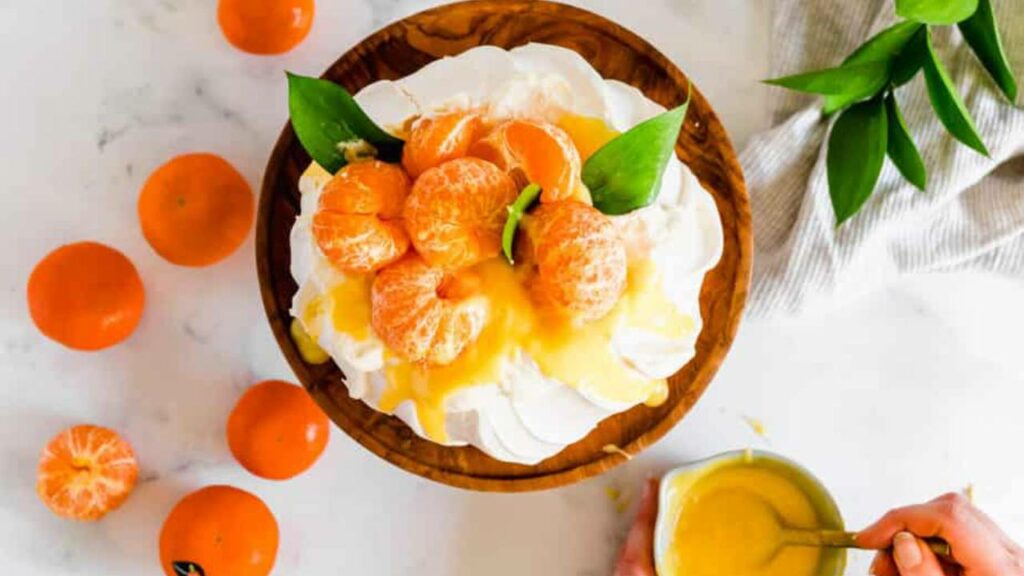
Adding the Toppings
After the fruits, it’s time for the final flourish. Drizzle passionfruit pulp for a tangy kick or spoon over some lemon curd for a bright, zesty flavor. Fresh berries can be added whole for texture and bursts of flavor. Finish by sprinkling a few mint leaves on top for a fresh pop of color and an inviting aroma. Each topping adds its own character, so don’t be afraid to let your personal taste guide you.
Serving and Storage Tips
Before diving into the delightful experience of presenting and storing Pavlova, remember that its meringue base is delicate and requires a gentle touch. The right approach can help you maintain its appealing texture and volume while keeping it tasting fresh.
Presentation Style
When you’re ready to serve your Pavlova, it’s all about the wow factor. Place your meringue on a spacious plate to give it prominence. Its surface should be pale and crisp, often with intentional cracks that add character. Don’t shy away from them; they’re part of the Pavlova’s charm. For a vibrant touch, drizzle with strawberry sauce, raspberry sauce, or blueberry sauce. You can also opt for a scoop of sorbet or a pile of fresh fruit. Seasonal fruits like pomegranate seeds, slices of stone fruit such as peaches, or a handful of blackberries not only add a pop of color but also impart a summery, fresh taste. Hosting a Christmas gathering? Mini Pavlovas make for an adorable festive treat.
Storage Suggestions
For storage, let the meringue cool on the baking sheet lined with parchment paper to avoid sticking.
If you have leftover Pavlova, or if you’re making it in advance, gently place it in an airtight container. Ensure the container is stored in a dry place at room temperature to preserve its texture and volume.
Typically, Pavlova can stay fresh for up to two days when stored properly. Resist the temptation to refrigerate, as this can introduce moisture and make the meringue soft and chewy.
Quick tip: A dash of acid like vinegar or a pinch of salt added during preparation can help stabilize your Pavlova and may slightly extend its shelf life.
Remember, utilize the right utensils to handle the Pavlova – a thin spatula or a cake lifter works wonders. By following these storage suggestions, your Pavlova will retain its intended texture and taste just as it should when it’s time to indulge.
Pavlova Recipes
Now that you know what a Pavlova dessert is, maybe you are ready to try and make it yourself?
Below are a few gorgeous examples. Be sure to check out all the pavlova dessert ideas we have found!